Forget what everyone’s told you about it not being worth it to make your own puff pastry! I remember hearing this from someone on the Food Network when I was young, so I never bothered to try and make it at home. While store-bought frozen puff pastry is convenient and reliable, this homemade version is so easy and so much better. No lamination is required for this rough puff method—just a vegetable peeler, a knife, and a whole lot of butter.
What’s the Difference Between Rough Puff Pastry and Puff Pastry?
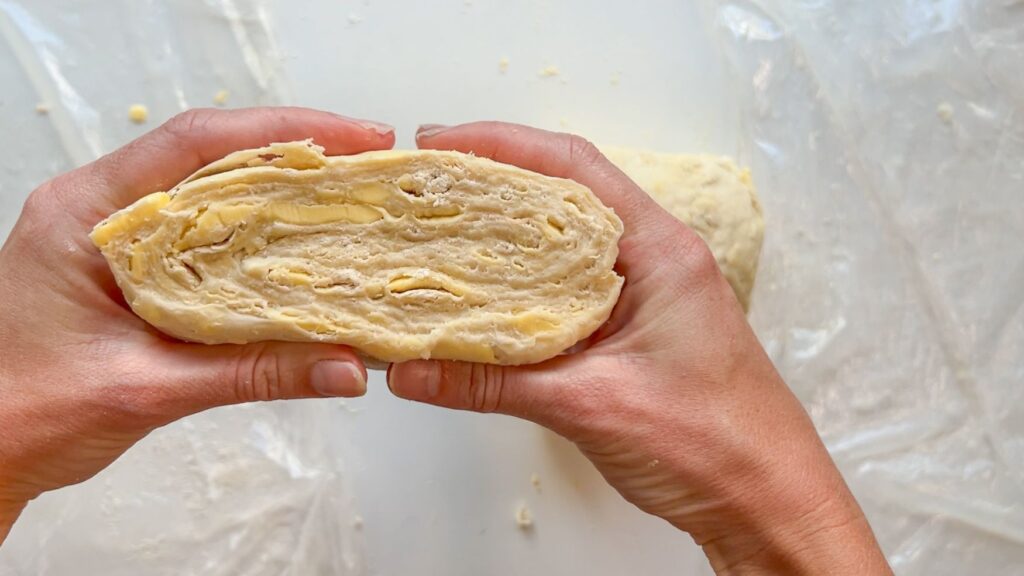
The rough puff method of making puff pastry involves incorporating small pieces of cold butter into flour, and then hydrating the dough with cold water. Traditional puff pastry uses the lamination process to achieve those layers of flour and butter that result in puffy, flakey layers when baked. With rough puff, you will still get those layers, just likely not quite as uniform as in a traditional puff pastry.

Is Rough Puff Pastry Hard to Make?
Lamination of any type is a delicate process that can be hard to perfect! Since rough puff pastry skips that step, it’s the easiest way to make puff pastry. My recipe involves thinly slicing the butter and then squishing the slices wit your finger so they become thin sheets of butter. This helps them layer well between the flour to create puffy, flaky layers when baked.
Why Is It Called Rough Puff?
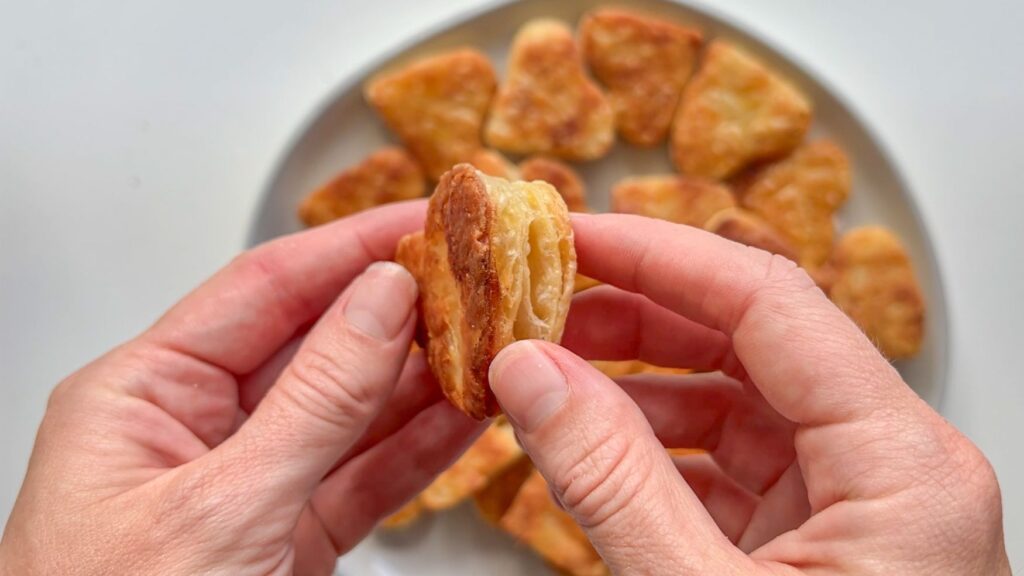
Rough puff pastry is just that: a rough version of the very precise regular puff pastry. It will puff roughly because of the less-uniform layers of butter throughout the dough. But it will indeed still puff, and well enough for almost any recipe you’d use store-bought puff pastry in at that!
Bake Notes
- This dough is supposed to be shaggy and somewhat dry when you transfer it to the plastic wrap before the first chill, not so hydrated that it completely sticks together into a ball like most other doughs. The purpose of chilling it before performing the folds it to allow the flour to fully hydrate.
- If while you’re rolling (either during the folds or after the final chill when you go to use it), the butter starts breaking through the surface of the dough, don’t worry! That’s what’s great about rough puff; it doesn’t have to be perfect and it will still turn out, even if some butter leaks. I actually prefer that because the bottoms of the pastries get very crispy in the melted butter.
- This recipe can easily be doubled to make two sheets of dough. If doing so, cut the dough in half after the final letter fold and wrap each separately in plastic wrap, roll out, and chill or freeze both until you are ready to use them. Or use one day of and keep the other in your freezer for up to six months (wrapped well and stored in an air-tight container).
- Once you make this, I promise you’re going to want to make it at least weekly. It’s so good, and there’s so much you can do with it. It can be baked into sweet pastries, like mini almond croissant cookies or raspberry toaster strudel muffins or used to make savory appetizers, like individual eggplant parmesan puff pastries or goat cheese, beet, and apple tarts.


The Easiest Rough Puff Pastry Recipe
- Total Time: 5 hours (including chilling time)
- Yield: 1 sheet 1x
Description
This is a foolproof easy puff pastry recipe; the results are so worth the effort.
Ingredients
12 tbsp (1.5 sticks) butter, chilled
1 ¾ cup all-purpose flour
1 tbsp sugar
1 tsp salt
Ice cold water
Instructions
- Fill a bowl with 2 cups of cold water and add a few ice cubes. Set it in the fridge to keep cold.
- Slice the chilled butter crosswise into thin slices (square-shaped). Spread them in a single layer on a plate and place the plate in the refrigerator so the butter stays cold.
- In a large bowl, mix the flour, sugar, and salt together with a fork or a whisk.
- Remove the plate of chilled butter and place the slices into the flour mixture. Toss together with your hands.
- Use your fingertips to gently squeeze the slices of butter so they become thinner, flatter, wider, and taller. You aren’t aiming to break them up into pieces, but rather create larger sheets from each one. If some do break apart, that’s totally fine.
- Add 1/2 cup of the cold water into the bowl with the flour and butter. Use your hands to scoop the mixture from the bottom and then press down onto it from the top. Repeat this scooping and pressing, adding more water by the tablespoon, until the dough starts to come together.
- Once the dough is clumping together into a shaggy, dry-ish dough, turn it over onto a sheet of plastic wrap.
- Use your hands to press the dough into a rectangle as best as you can. Wrap it tightly in plastic wrap and refrigerate it for 2 hours.
- After 2 hours, remove the dough from the refrigerator. Unwrap it and place the dough on a lightly floured surface.
- Using a floured rolling pin, roll the dough up and down vertically into a rectangle that’s three times as long as it is wide.
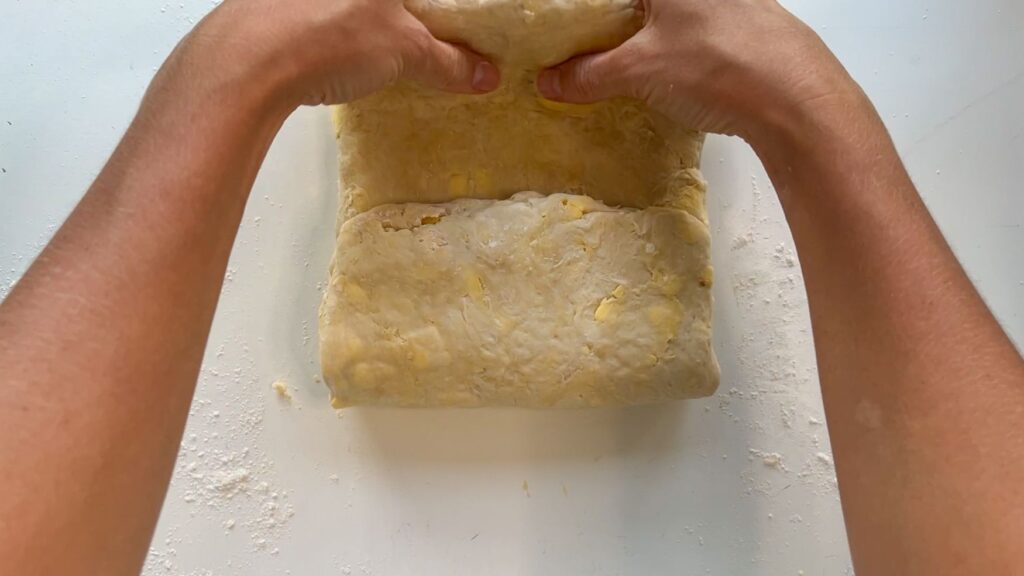
- Perform the first letter fold: take the bottom third of the dough and fold it up into the center.
- Take the top third of the dough and fold it up into the center of the dough so it rests on top of the previous fold. You should now have a smaller rectangle with three equal layers of dough.
- Turn the rectangle of dough so the exposed edge of the top fold faces the right side (or left side; you just don’t want it facing towards you or away from you).
- Again, roll the dough up and down vertically so it flattens once again into a rectangle that’s three times as long as it is wide.
- Perform the same letter fold: Take the bottom third of the dough and fold it up into the center. Take the top third of the dough and fold it up into the center of the dough so it rests on top of the previous fold.
- Again, turn the rectangle of dough so the exposed edge of the top fold is on the right side.
- For the last time, roll the dough up and down vertically so it flattens into a rectangle that’s three times as long as it is wide.
- Perform the last letter fold: Take the bottom third of the dough and fold it up into the center. Take the top third of the dough and fold it up into the center of the dough so it rests on top of the previous fold.
- Wrap this smaller rectangle of dough loosely in plastic wrap on all sides and press down on it so it flattens into and fills up the plastic in a square or rectangle shape. You can also use a rolling pin to push it into the corners of the plastic wrap. It should still be thick pretty thick.
- Refrigerate the dough for at least 2 hours before using it. If you’re not going to use the dough within 24 hours, you can freeze it to use later. If frozen, let it thaw overnight in the refrigerator before use.


Pingback: Individual Eggplant Parm Puffs – The Bake Note
I thought making puff pastry would be hard but this was easy and so good!
Yay! I’m so glad to hear that. It’s so fun to make.
Pingback: Almond Croissant Cookies – The Bake Note
Pingback: Pumpkin Spice Palmiers – The Bake Note
This puff pastry recipe works every time; even if you don’t know what you’re doing! It’s not as intimidating as I thought.
Pingback: Goat Cheese, Beet, and Apple Tarts – The Bake Note